A simple meaning of policy in AEM is to design a particular component according to your need, it means you can add variations in your component.
AEM gives a special functionality so that we can edit our component or I can say that we can design our component through external CSS and JS. So basically AEM policies are configurations, that govern the behavior of components across an entire section of an AEM website.
Note : below steps are only for Out of the box component, if you want to enable and create policy for your custom components then you need to follow this ( url will be added ).
Steps To Create Policy In AEM
So, there are few steps to create policy or add variation to design the component.
- Go to your Template which is used to create page and then create policy
- Create Policy and Policy Group with styles and class
- Use the policy in your component
- Go to your code base (IDE)
- Write styles in your particular component with class selector in scss file
- Open terminal Hit (npm run dev)
- Right Click on clientlibs folder and export to aem server
- Reload the page
Let’s Understand These Above Steps In More Explainable Way
1) Go to your Template which is used to create page and then create policy
Note: You can enable at any template by template editor
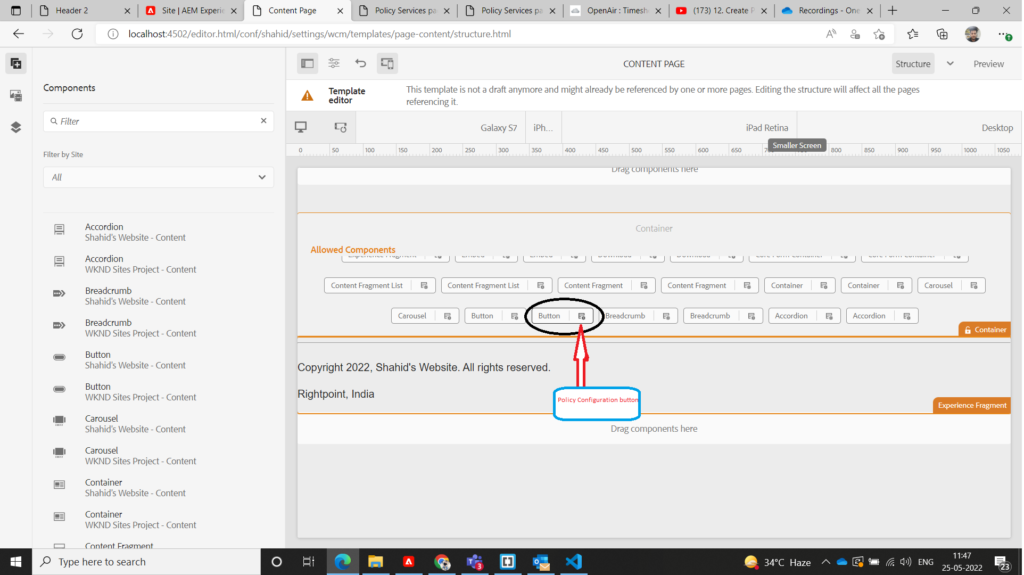
So in this step you need to edit template which is going to use by any page, You need to edit it because whenever we are going to use policy then we need to enable it on the template level and you can create as many style attributes and classes please refer below Picture.
Note: I am going to take example of Button component in this article to demonstrate about the policy in AEM
2) Create Policy and Policy Group with name and class
Now we need to create policy, So click on the button right configuration icon, you can refer below image
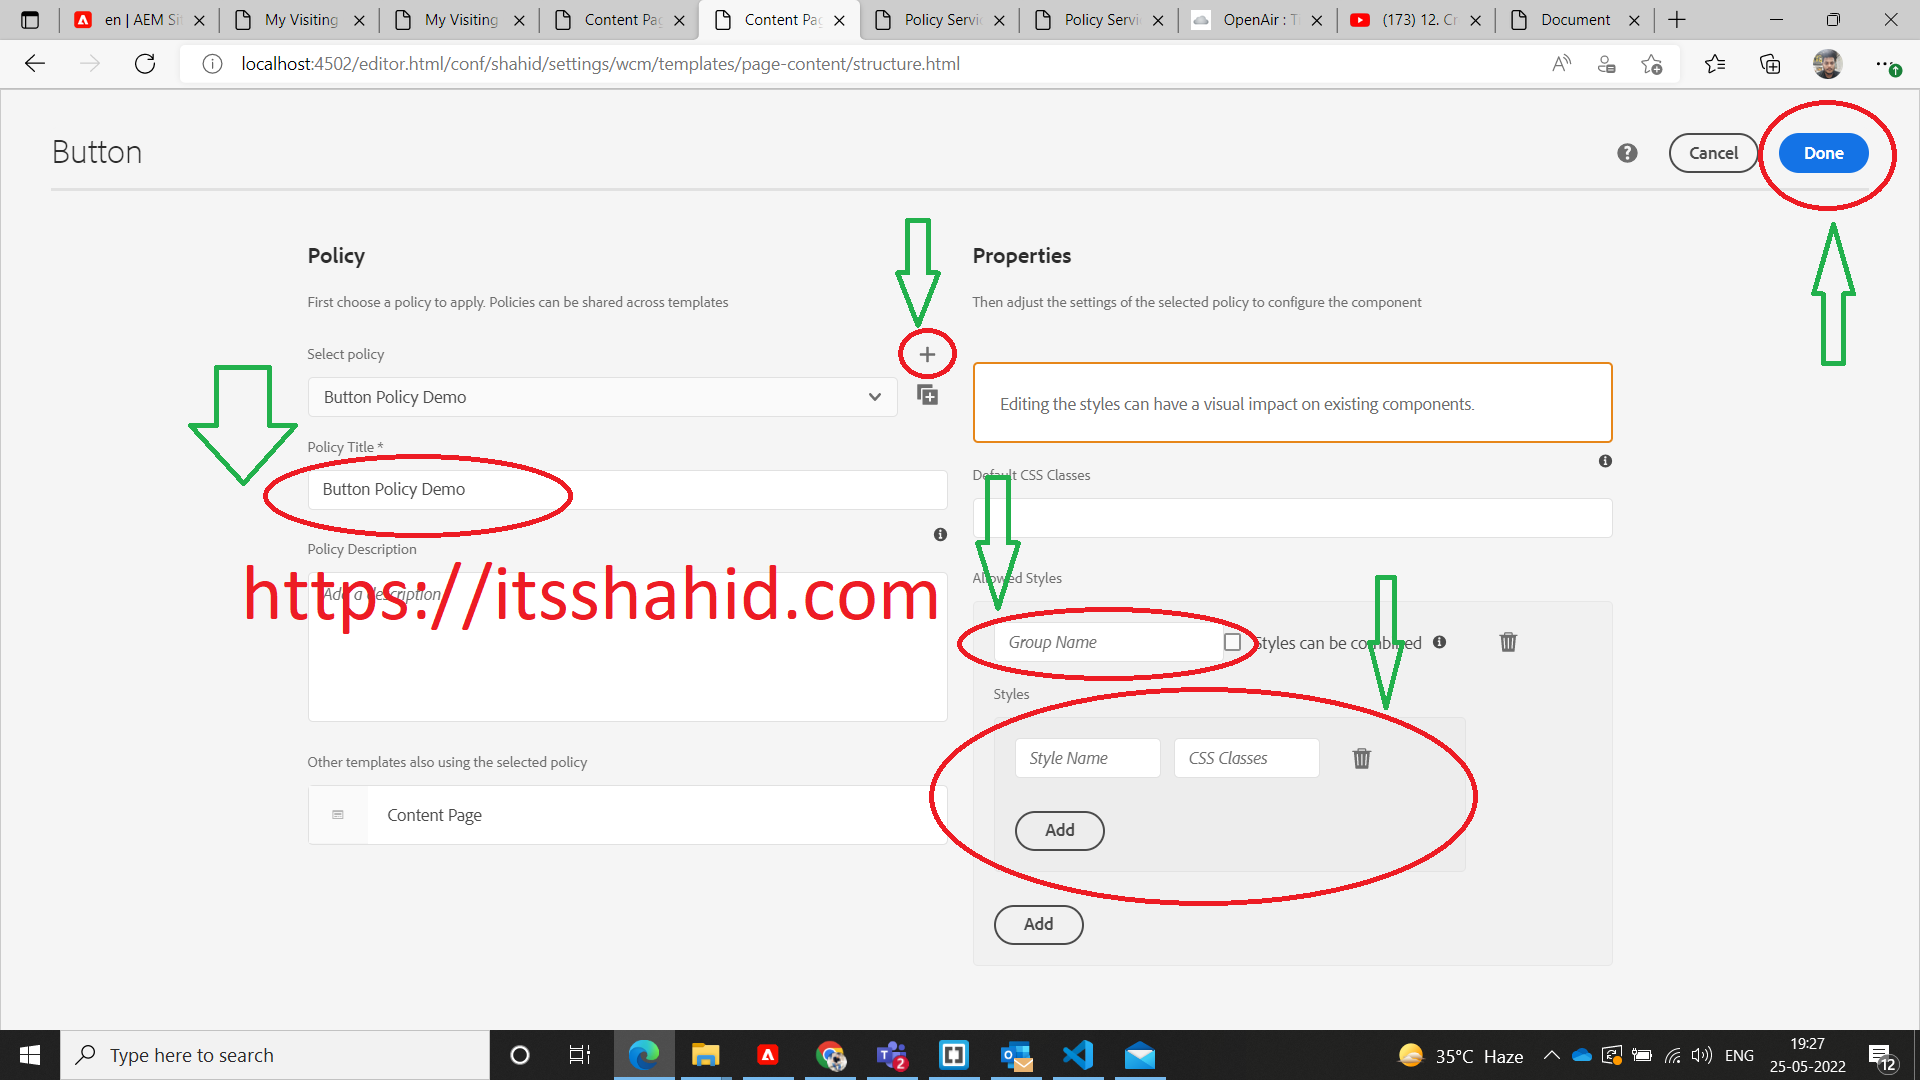
After click, a new page will be open and asks for few inputs to create policy.
So here is 3 internally steps:
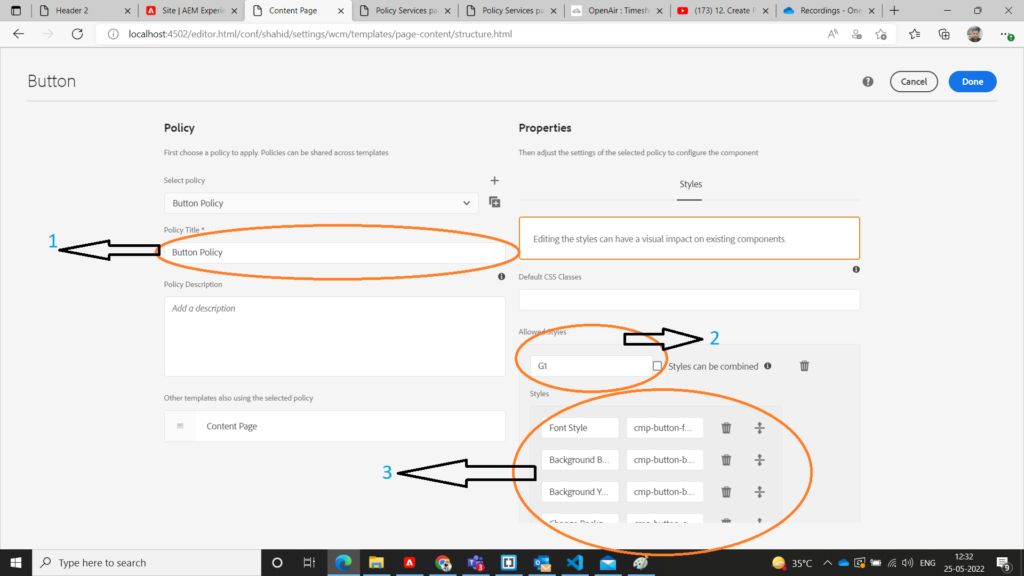
1)=> In very first step Enter a policy name which is related to your component or a meaningful name.
2)=> In second step you need to give a group name so that we can give a group and enter some style within this group
Lets take an example, suppose you have created a group for button background color change and have three or four different color, then you can keep group name “Button Background Color”.
3)=> In third and last step, we can set Style name and class for that particular style. Style name is used to basically identify the particular policy whenever you are going to use, So keep name of the Style relatively and in CSS class input you need you give a related class name, for example I am creating a yellow color background So, Style name will be “Background Yellow” and CSS class name “cmp-button-yellow-background” as I have added four styles under a particular group “G1”.
3) Use the policy in your component
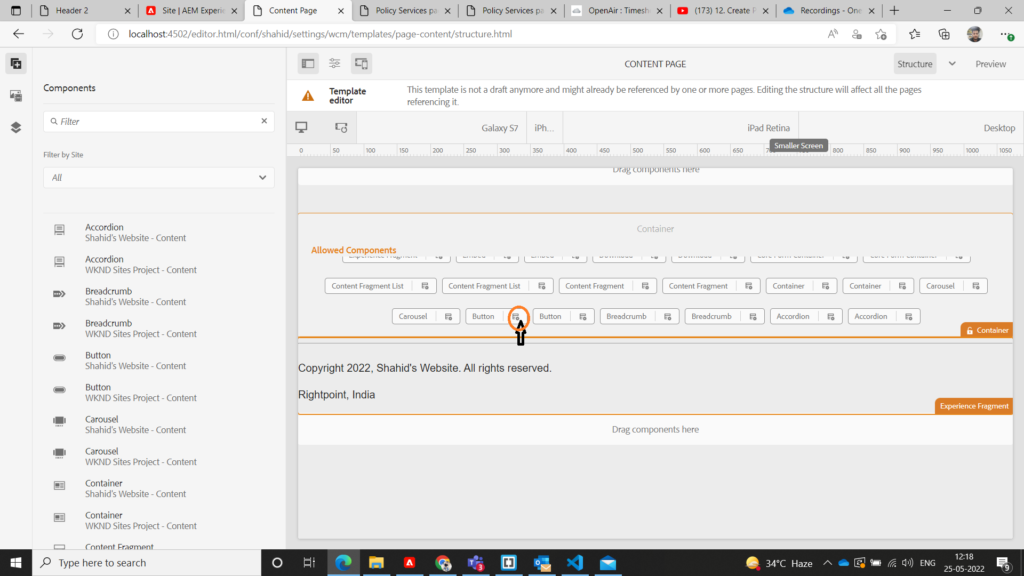
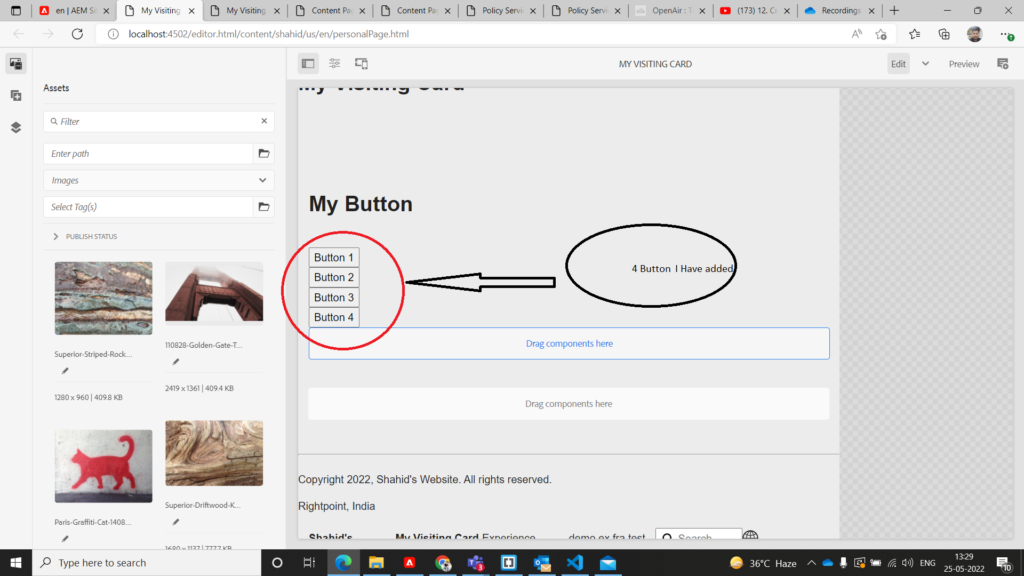
Create page and import any component as I mentioned that I am taking button component for example. So in below picture I have added 4 button.
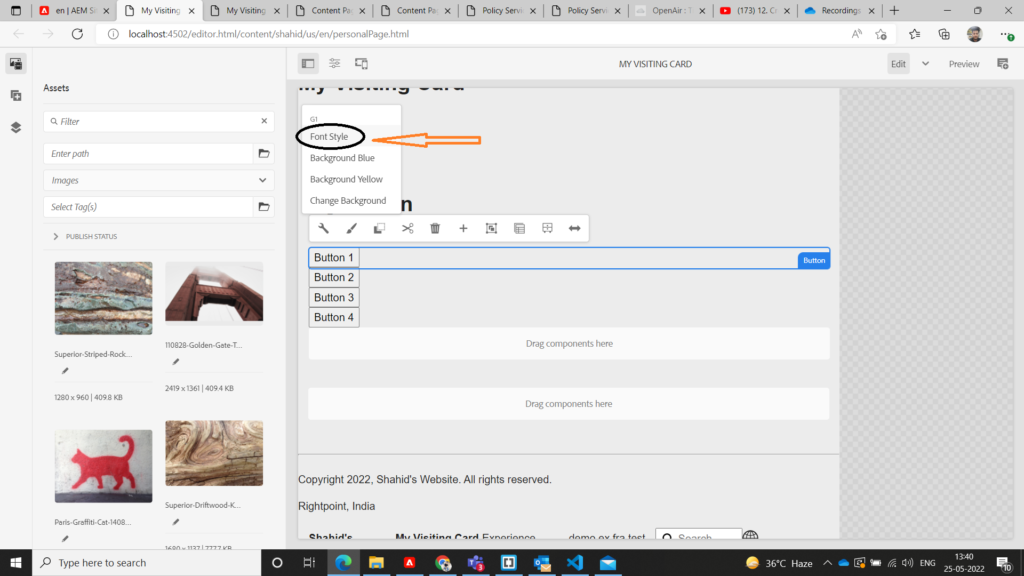
Now click on any button and select brush icon, this I icon can only visible once you created policy, which already created in 2 step.
And select respective styles
4) Go to your code base (IDE)
Go to your code base means open AEM site project in your IDE, So I am using Visual Studio IDE for AEM Development and I recommend Visual Studio you too. Some important Extension should be install in Visual Studio for AEM development.
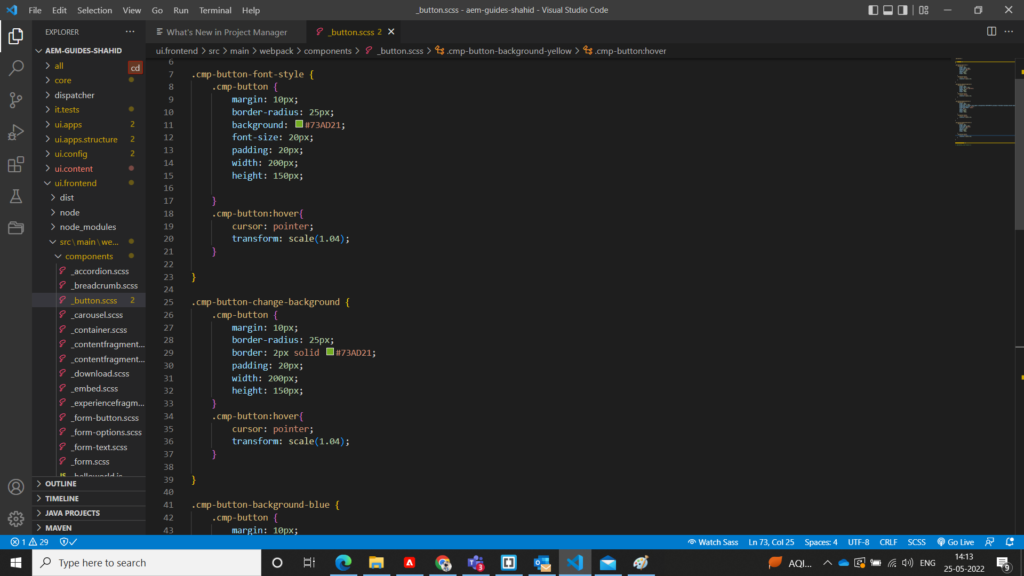
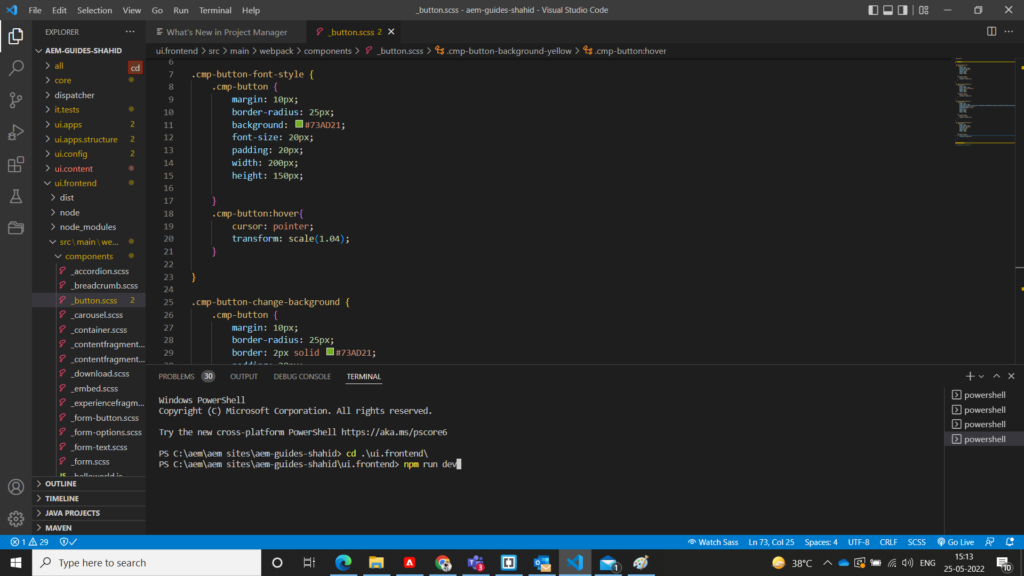
5) Write styles in your particular component with class selector in scss file
To find component you need to go this folder: \ui.frontend\src\main\webpack\components\_button.scss
Now target class name which is used when you created policy and add styles with Style name CSS class.
Start writing code, for example I have design button please view below screenshot
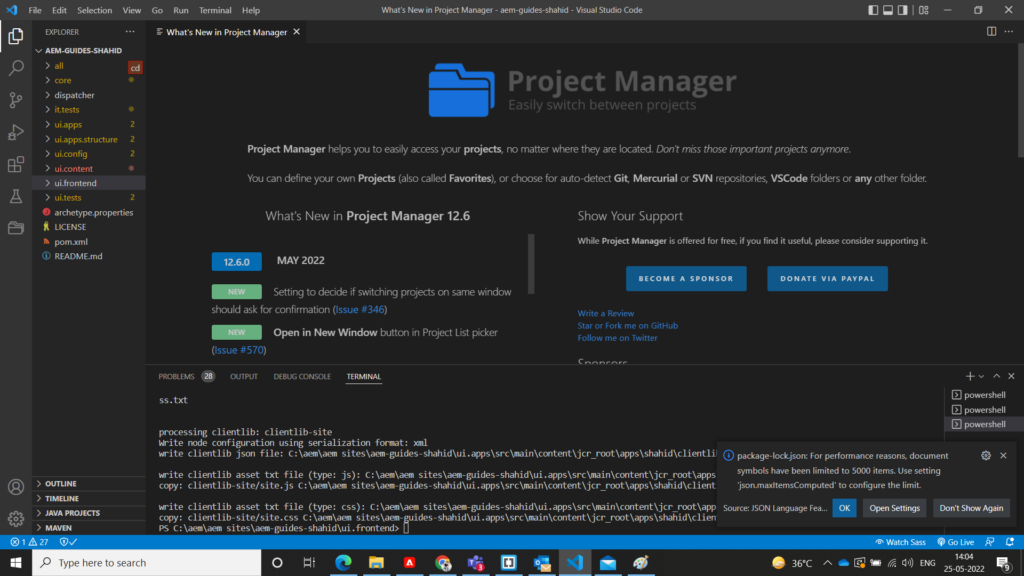
6) Open terminal Hit (npm run dev)
First you need to go in ui.frontend directory by cd command cd ui.frontend/ and then run this command
PS C:\aem\aem sites\aem-guides-shahid\ui.frontend> npm run dev
these command is necessary because we are writing code in scss, So need to change in css. After hit npm run dev command you will see css code will be added in \ui.apps\src\main\content\jcr_root\apps\shahid\clientlibs\clientlib-site\css\site.css. If you did not get any error then you’re good and completed step 6 successfully.
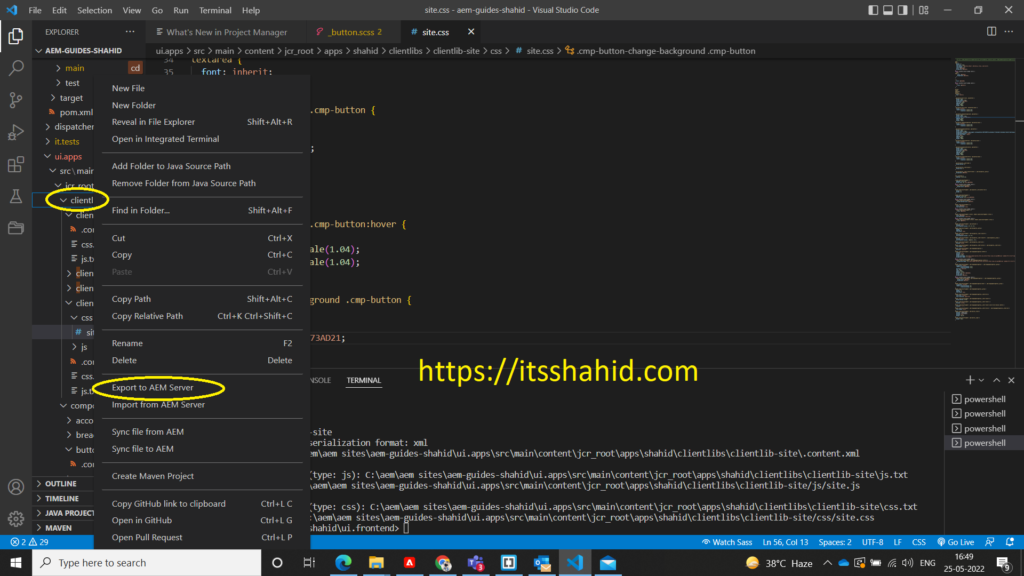
7) Right Click on clientlibs folder and export to aem server
To view changes in pages, we need to export code in AEM server. To export we need VScode AEM sync extension then go to your ui.apps\src\main\content\jcr_root\apps\shahid\clientlibs now right click on clientlibs folder and click on Export To AEM Server, Hurrah ! you successfully export in AEM server.
8) Reload The Page
Reload the page which is view as publish, Now you will be seen changes are applied